Thank you!

Thank you for stopping by!!!!
Showing posts with label pattern. Show all posts

Wednesday, October 7, 2015

Dog Gone Cute Blog Hop

Woof, Woof!  

Translated - 
         Welcome to my finished Dog 
         Gone Cute Project!


I had so much fun making these 
cute dogs from quilt designer 

Lorna is amazing and I would like to thank her
for putting together this Blog Hop and 
creating this Dog Gone Cute Pattern. 


When I saw this pattern, I just fell
in love with it and I just knew 
I had to make it! Order your
copy today here and check 
out her other amazing patterns.

I decided to make a cute pillow for one 
of my girlfriends.  She can place 
this adorable pillow on her bed! 
 I just know she will fall in love 
with it the moment she
sees it!


Here's my finished pillow!  
Dog Gone Cute!!!  So
fuzzy and squeezable! 


Thank you for stopping by!
Please visit and
check out all the Blog Hop
 participants and their 
Dog Gone Cute Finished Projects below!!! 


Tuesday, October 6
Karen of Run Sew Fun 
Anja of Anja Quilts
Kelly of Quilting it Out

Thursday, October 8
Nina of Inchworming  your here
Brandy of Pampered Pettit

Tuesday, October 13
Laurel of Quilts by Laurel

Thursday, October 15
Rachel of Quiltineering
Julie of Mack and Mable

Tuesday, October 20
Cathy of A Quilting Chick
Selina of Selina Quilts
Shauna of Shauna’s World
Kathy of Kayak Quilting

Thursday, October 22
Britt-Inger of Hill Valley Quilter
Judy of How ART You?
Louisa of Sewmotion

Tuesday, October 27
Stephanie of Jak and Will
Cristina of Pretty Little Quilts

Thursday, October 29
Abigail of Cut & Alter
Magdalena of iloveneutrals
Susie of Susie's Sunroom


Psalm 100:5a


For the Lord is good and
 his love endures forever...


Tuesday, October 7, 2014

Halloween Fabric- What to Make???


I've been working on my daughter in laws' baby shower!  So exciting because it's in two more weeks!  Once the shower is over I can post pictures, but not until.   

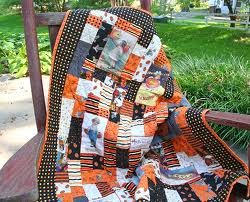
I just couldn't stay away from fabric.  I'm getting the itch to quilt. I thought I'd share some of my Halloween Fabric.  I'd really like to make a Mini #Halloween #Quilt or runner for my kitchen counter, but can't seem to decide on a pattern.  

Calling out for any suggestions.


Possible choices are:
(All images were found on the site below)


I guess you'll all have to wait to see what pattern I decide on!!!
Which one would you choose??


                                                   He Has Made Everything Beautiful In Its Time.  
Ecclesiastes 3:11  


Wednesday, September 17, 2014

Repair To Restore A Vintage Quilt

I was given this #vintage #Sue Bonnet quilt from either 
the 1930's to 1940's to make some repairs
 to this old damaged quilt.


I thought I took a picture of the damaged quilt but 
my files showed none.  (This blog was posted and
some how deleted.  I am rewriting and reposting.)


It's hard to tell but, a few of the dresses 
on the Sue Bonnet quilt needed to be 
replaced.  Here's one damaged dress.  


Before I attempted to work on this quilt I had 
to find some matching fabric that would go 
with the original pieces.  I did find the bright 
yellow one you see on the right.  It actually was
 a reproduction fabric from the 1940. 
 It was way to bright to use on the quilt so I 
bleached the fabric.  I would have liked the 
fabric to remain yellow but the end result was great.


after                                                                    before


After preparing the fabric
I carefully removed the embroidery floss from 
the dresses, the sleeves and on part of the bonnet
 in order to replace it and create a new pattern.  
The rest of the embroidery floss was 
removed from the bonnet once I started sewing.


I traced the dress onto the fabric I 
prepared.  The original fabric had the seam 
allowance folded under so I just added
 1/4" seam allowance to each dress.


I had to reverse one of the pattern 
pieces because Sue was facing the other way.


Here you see the dress pinned in place with 
the seam allowance turned under 1/4".


I also pinned the sleeve in place. 


I matched the color of the original embroidery floss used 
and began to sew.  In order to make it look right I did 
remove the rest of the embroidery floss from the bonnet.


When it came to repairing the larger holes on this vintage quilt I simply took some cotton thread and stitched around the hole to prevent the hole from getting larger.  The smaller holes were mended by hand with the same cotton thread to match the fabric.


Here's the end result and the quilt has been restored.  Can you tell which ones were redone?


He Has Made Everything Beautiful In Its Time.  
Ecclesiastes 3:11 


Thursday, July 24, 2014

Dresses for Mila!

Just recently I had the pleasure of attending
 a baby shower!  The young lady is adopting 
a two year old orphan from Uganda, Mila!
That is so amazing!

I whipped up a few simple dresses 
for Mila.  Using the #pillow case
 pattern for the first two dresses,
 this is what I sewed!


I just measured the front side of 
dress from seam to seam and cut 
 a piece of lace with the 
measurement I just took.  I  
sewed the top of lace in place!


Here I  cut (2) pieces of lace measuring 7" 
long.  Then I cut (1) 7-1/2" long 
piece of dress fabric and pressed 
down all the edges. Next,  sew
 this piece down the center!  Remember
 to start sewing below the top seam or 
you won't be able to get the 
ribbon through the seam!!


Here I used a pattern, but the pattern was
 so bad.  I ended up making by own pattern! 


Here she is wearing one of her dresses!


So Cute!!


He Has Made Everything Beautiful In Its Time.  
Ecclesiastes 3:11  


Wednesday, June 18, 2014

I Love To Quilt

Add caption


I'm so excited to share this mini quilt,  I've had the pleasure to be a tester for  Lorna McMahon @ Sew Fresh Quilts newest pattern!  

Here's a picture of just the top I sewed before realizing I had sewn the letter (I) upsized down! I did fix it!  I also changed the blue on the iron!  I decided to use gray as you will notice on the finished quilt below.

It's so adorable and you have the option of making it horizontal or vertical.  I choose to make the horizontal mini quilt because it best fits my wall space.  I'll be making this quilt again and again for a few of my friends. This mini quilt really makes a great gift for either a birthday, Christmas, or a just because gift for yourself! 


Lorna includes full color photos and diagrams with easy to follow instructions.  Her list of materials, fabric requirements  and sewing directions makes this quilt fun to sew! This mini quilt measures about 17" x 32".

Here's my finished quilt!!  


Here's a picture of the backing and the binding I used!


Thank you Lorna for allowing me to be a tester! 

Don't forget to visit Lorna's site to see both mini quilt options!


Saturday, March 15, 2014

30/30 Sewing Challenge Week 2


March 18th - 30/30 Sewing Challenge


Here's my finished blouse for the 30/30 Sewing Challenge - March 18th!


              Picture                    In the next few steps I show you a few steps of  how I finished my goal for the 30/30 Sewing Challenge!30/30 Sewing Challenge/ Berry Barn Designs


This is the fabric and pattern I decided to use for my second project!  I choose a light weight fabric from my stash.  


 After cutting out my pattern pieces I began to sew front details of top!


I decided to make my seam allowance french seams.  You first sew wrong sides together, press seam, and then sew rights sides together to create your french seam.


I pinned the hems of my top and then sewed them my machine.


 I checked the fit!


Sleeves are hard to french seam so I decided to serger them to garment top.


Sewn the neck line and button on to blouse.


Here you have my second top I've made in a week.  Thirty minutes a day!  So wonderful!


Thursday, January 9, 2014

What's in the Bag and Making Bias Tape


Thanks for stopping by because this week it was time for me to pull out one of my patterns I had purchased while on sale at JoAnn's Fabric Store.   I chose Simplicity #2381.  I really liked  4 out of the 5 bags featured on the front envelope and decided to make View D first.


Here's the finished bag.  I love the way it turned out. The pattern called for a light interfacing, and a package of 1/2 inch bias tape (also known as binding).  Most packages contain 3-4 yards (but I used about 5 yards on this bag). I wanted the bag to have more body so, what's in the bag! Instead of light interfacing, I used a light cotton batting (batting is used for quilts).   Don't use thick batting unless you quilt the fabric before you cut the pattern pieces out.  Otherwise,  your bag will not turn out correctly.


I located the center front by folding the pattern pieces in half.  Marking center with sewing pins. Then I quilted the two layers together (front fabric and batting) by sewing on the center bag front.  Next,  I lined up the pressor foot with the first line and kept using each line has a guide for the next sewn line. I did come across extra bulk when matching some of the seams especially along the binding areas. Also,  I decided to make my own bias tape  because I wanted a coordinating fabric and nothing I had seen was available to match my bag.


I made my own bias tape and below are two ways to make it.

1. Strip Method~

Take a strip of fabric.  The example here is 7" by the length of the fabric.


Fold your fabric over.


Cut on that folded line.  Remember this is your 45 degree line. Cut out your strips to desired width.
Here you have your cut strips.
Place right sides together and sew 1/4" seam allowance to create your strips.


2. Continuous  Bias Tape
The second method  and the method I prefer.~ A fabric needs to be made in to a square of your desired fabric and cut from corner to corner. (For the bag above,  I made my square 20" and  had about 7 yards of bias tape.)  Fabric is right side up.   I placed a pin on the top and bottom of the square because it makes it easier to understand placement of fabric when your moving it around.  Take the bottom triangle


and place it above the other triangle where pins meet. The fabric is still right side up.

Fold over top piece (right sides together) and sew a 1/4" seam.


Press seams open and place fabric wrong side up.  Draw 1/4" seam allowance lines at top and bottom.  Measure out desired width and draw lines. (For this project, I cut the strips 2" wide.)   Place a pin on the first line drawn (top) and place a pin on the second line drawn (bottom).


Match pins with right sides of fabric together and sew.                                                                                                                                                                                                                                                      
Take your scissors and cut on drawn lines. You will now have a continuous strip. 


To finish the bias tape I like to press my strips in half with an iron and then guide it through the bias maker tool (these tools come in different sizes).  If you don't have a bias tool, don't worry.  
All you have to do is fold your strip in half, press.  Open up pressed seam and press raw edges toward center fold line. When using your iron be careful.  Your fingers tend to feel the heat of the iron especially when using stream to really get a nice crisp fold.
How to Determine the width of your bias tape:

The way I determine the width of by double bias tape is very simple:

Width needed for project  X  4 = width of cut strips

For this bag I needed
1/2" double bias tape X  4 = 2" (width of cut strips) 


I hope you have enjoyed me sharing this project along with some tips on how to make your own bias tape.  You don't have to follow the pattern exact.  If you have any questions, please ask. Thanks!