Thank you!

Thank you for stopping by!!!!

Friday, January 31, 2014

14 Days of Pampering for Valentine's Day and Great Ideas- Part 1


It's almost Valentine's Day, and it's time to pamper yourself, whether you have a man in your life or not!  This is for you.  With the new year well on it's way, lets get in gear and start a beauty regiment for the next 14 days.  If you have little ones, involve them too.  I'll give you a few cute ideas later.

Okay, are you ready!! The first day, today, we will be taking inventory with ourselves.  Take a pad of paper, a mirror,  a calendar and something to write with.  That's all you need for the first day.  Stand in front of the mirror and examine your hair.  You might need to color your hair and get it cut .  Maybe your hair feels dry.  Write it on your pad of paper.  Next look at your hands and feet.  Most likely you'll need a fresh coat of nail polish on both your hands and feet just before Valentine's Day.  I could use a pedicure to get those heels nice and smooth!  Our hands always take a beaten with sewing, crafting, doing the dishes, cleaning and so much more.  You will then be looking at your face and take note of what you see.  Is your skin dry, oily or do you have combination skin?  Have you been working hard and not getting enough sleep, so you notice dark circles under your eyes.  Write it down on your pad of paper. Take one more look in the mirror and say, "I'm beautiful!" Write it on a your pad of paper! I'm beautiful!!! I deserved to be pampered!!!


Each day I have shared a tip or two on how you can pamper yourself for Valentine's Day.  Okay, ladies, you know that we don't need an excuse to make ourselves feel beautiful and to be good to ourselves, but it sure is great to have one!  

Most of these pampering ideas will be DIY.  I can't cut my own hair so for that I will leave it up to my hair dresser.  Some of your days will be different then mine.  Just remember to swap it with another day. 

Don't get sad, if your man is away, your single, or you feel like you don't have the money to spend.  Maybe you feel like you have no reason to pamper yourself.  That is simply not true.  When you do meet that special someone, I would think you would be attractive   You deserve it!!  If money is tight, most of these ideas are DIY with items we already have at home.  Besides, you don't have to do them all.  Pick and choose what works for you!!!

Get some of your girlfriends together and have them over.  Plan a movie night, a pot luck dinner, game night or maybe just have wine with the girls and enjoy a few appetizers with your friends.   If it's just you and the kids, bake cookies.  Make cards for the Grandparents.  If you're alone that night make plans to going shopping, or buy some pretty fabric to make some pajamas!!


Day 2    Today and everyday lotion up. In the morning after you
              shower and before you hit the sack.  Target your face, 
              neck, hands/arms,  legs and feet.  We want our skin to be
              soft! I use a different lotion for my face then I do for my
              body.

Day3      Schedule your hair appointment to have it colored and cut
               for whatever day works for you.  I color my own hair but,
               I do need it cut by someone, so this will take two
               different days.  Also, make an appointment with yourself
               to do your nails and pedicure.  Mark it on your calendar!
               Don't forget to lotion up twice a day!!!  

Day 4     Drink more water!  Add at least  2-8 ounces of water to
               your day.  I find it hard to drink water so I make a light 
               tea in the evening before bed.  A light tea means I dunk
               my tea bag 3-4 times in my cup of hot water just enough
               to give the water some color.  Do this everyday!! It's 
               important to hydrate the skin!!! Lotion up!


Sunday, January 19, 2014

Join Some Communities!


Hello Fellow Readers!


I need to continue to stay focused and accountable for the things I write and what better way then to blog about it. May this inspire and encourage you to climb up those steps into those list of goals you've made for your own personal growth.  If you haven't, why not get a pen and some paper and jot down a few things you'd like to get started on and see through in the next couple of weeks, month or even year.  

Back in December I wrote a blog, I Can Do All Things, which I should have named,  I Can Do All Things And So Can You!  But I didn't and I can't cry over spilled milk. Carry on, Nina! No looking back only ahead to what's next.

That first goal on my list was to grow my blog my joining a few blogger communities and by studying other sites which I have been doing.  There's a lot of really great sites out there.  Great support  too.  A few of the Communities in Blogger I've joined that are supportive and have great feed back are: 

Sewing For Children 
https://plus.google.com/u/0/communities/106917099947792662177

The Newbie Blogger         https://plus.google.com/u/0/communities/106424019938464282585/stream/a3915cc5-01b8-4150-9db1-6fa6f83c7a02

Recipe Sharing Community
https://plus.google.com/u/0/communities/104445639155204998254

Check out all the communities that you are interested in and make sure you #1 and comment!  Help and answer any questions you know the answer to.  We want to make others feel welcome and not   alone, because we all matter!  (Do to others as you would have them do to you. Luke 6:31)  Support one another is key! 

Also, during the month of January I've been trying to fix my blog, make it look better (it's not there yet), reading up on adding widgets, etc. Boy, does it take time to learn how to do all that stuff.  I'm not very computer savvy so it takes me just a wee longer to accomplish.  I want you to know that I'm such a new blogger and by encouraging you, it also encourages me to press forward to the goal that is before me.  

It's okay to cry, to fall, and to get frustrated.  Maybe, some of you have been blogging for a while and you're tried and have run out of ideas.  Join some new communities and be refreshed. Deep down in our hearts we all have a desire to produce a great blog, take great pictures, and dish out fabulous material.  There are so many of us out there that are in the same boat.  You are not alone!!  

Remember you can only take one step at a time!!! 


JOIN SOME COMMUNITIES-JOIN SOME COMMUNITIES-JOIN SOME COMMUNITIES


Thursday, January 9, 2014

What's in the Bag and Making Bias Tape


Thanks for stopping by because this week it was time for me to pull out one of my patterns I had purchased while on sale at JoAnn's Fabric Store.   I chose Simplicity #2381.  I really liked  4 out of the 5 bags featured on the front envelope and decided to make View D first.


Here's the finished bag.  I love the way it turned out. The pattern called for a light interfacing, and a package of 1/2 inch bias tape (also known as binding).  Most packages contain 3-4 yards (but I used about 5 yards on this bag). I wanted the bag to have more body so, what's in the bag! Instead of light interfacing, I used a light cotton batting (batting is used for quilts).   Don't use thick batting unless you quilt the fabric before you cut the pattern pieces out.  Otherwise,  your bag will not turn out correctly.


I located the center front by folding the pattern pieces in half.  Marking center with sewing pins. Then I quilted the two layers together (front fabric and batting) by sewing on the center bag front.  Next,  I lined up the pressor foot with the first line and kept using each line has a guide for the next sewn line. I did come across extra bulk when matching some of the seams especially along the binding areas. Also,  I decided to make my own bias tape  because I wanted a coordinating fabric and nothing I had seen was available to match my bag.


I made my own bias tape and below are two ways to make it.

1. Strip Method~

Take a strip of fabric.  The example here is 7" by the length of the fabric.


Fold your fabric over.


Cut on that folded line.  Remember this is your 45 degree line. Cut out your strips to desired width.
Here you have your cut strips.
Place right sides together and sew 1/4" seam allowance to create your strips.


2. Continuous  Bias Tape
The second method  and the method I prefer.~ A fabric needs to be made in to a square of your desired fabric and cut from corner to corner. (For the bag above,  I made my square 20" and  had about 7 yards of bias tape.)  Fabric is right side up.   I placed a pin on the top and bottom of the square because it makes it easier to understand placement of fabric when your moving it around.  Take the bottom triangle


and place it above the other triangle where pins meet. The fabric is still right side up.

Fold over top piece (right sides together) and sew a 1/4" seam.


Press seams open and place fabric wrong side up.  Draw 1/4" seam allowance lines at top and bottom.  Measure out desired width and draw lines. (For this project, I cut the strips 2" wide.)   Place a pin on the first line drawn (top) and place a pin on the second line drawn (bottom).


Match pins with right sides of fabric together and sew.                                                                                                                                                                                                                                                      
Take your scissors and cut on drawn lines. You will now have a continuous strip. 


To finish the bias tape I like to press my strips in half with an iron and then guide it through the bias maker tool (these tools come in different sizes).  If you don't have a bias tool, don't worry.  
All you have to do is fold your strip in half, press.  Open up pressed seam and press raw edges toward center fold line. When using your iron be careful.  Your fingers tend to feel the heat of the iron especially when using stream to really get a nice crisp fold.
How to Determine the width of your bias tape:

The way I determine the width of by double bias tape is very simple:

Width needed for project  X  4 = width of cut strips

For this bag I needed
1/2" double bias tape X  4 = 2" (width of cut strips) 


I hope you have enjoyed me sharing this project along with some tips on how to make your own bias tape.  You don't have to follow the pattern exact.  If you have any questions, please ask. Thanks!


Tuesday, December 31, 2013

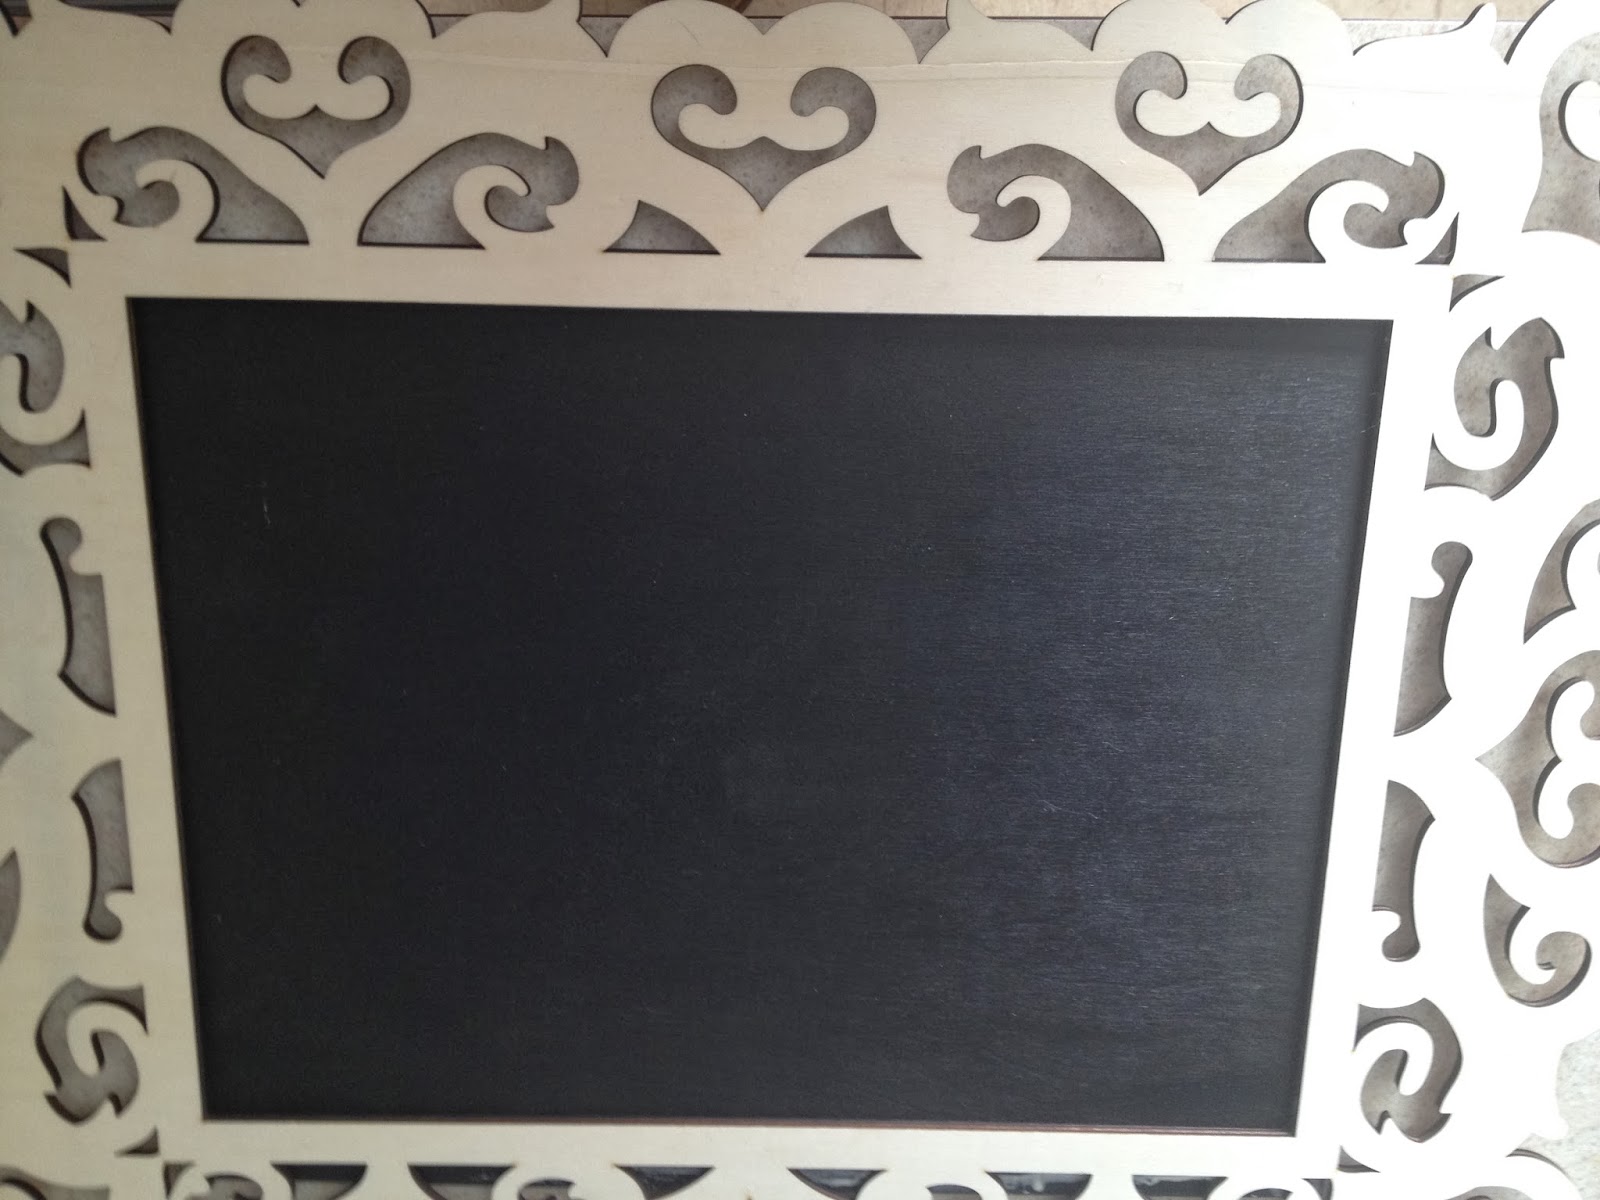
Easy to Do-DIY Chalkboard Frame Craft


I've been wanting to make a chalkboard frame for months.  I see them around everywhere!  So a week before Christmas, I went over to Michael's Craft Store and picked up a few supplies for my chalkboard frame.
You will need: wire ribbon (about 40 inches)
scissors (not your good scissors)   
wood glue
paint (your choice of color) I used black or keep it natural 
sponge brush
chalkboard paint (your choice of color) I used black
frame 
wood (at least 1/2" larger then frame whole
tape measure (not shown)
chalk to write on board


  First, I measured my frame and piece of wood.  Cut your piece of wood to fit the back. On the frame you see below it's 1/2" larger then the opening of the frame because I didn't want the board to show on the front size because of the holes in the frame. If you purchase your board at Lowe's, they will cut your board for free.  Michael's had the right size I needed, no cutting was necessary.


Next paint your board with Chalkboard Paint and let it dry 1 hour between coats, I did 3 coats.  The last coat, let dry over night (Follow manufacture's instructions).  Also, paint your frame with whatever color you desire.  I used Folk Art outdoor acrylic paint in black just because that is what I had.  In the examples below you will see that I left the frame natural, you could paint a clear on to it. Further down you will see other examples in different colors.


The next day, bead a line of wood glue around the edge of board (not to much or it will bleed to the front).


Front side-lay the frame over glued board. If you get glue on the right side, wipe immediately with a damp cloth.


Back Side- use books to weigh it down to help it dry overnight!


Here's a smaller frame in natural. I wanted the black to show on the front, so board was cut a little smaller then frame.


(Example in black)


(Example in white) The black frame is underneath it.


Take your ribbon and cut to desired length.  I cut mine 40".


Run ribbon through holes.


Tie knots on either side.


Make bows and tie again, so ribbon won't come undone.


Write your message!


Hang and enjoy!!!


I hope you give this craft a try.  It was fun and I just love my new chalkboard frame!!!  Please post pictures of your frames.  I would love to answer any questions you may have, so please ask!

May you and yours have a happy, prosperous, and fun filled year!  Happy New Year 2014!

Friday, December 27, 2013

I Can Do All Things


During this crazy month of December, I kept thinking, there has to be a better way to  accomplish all of life's craziness (at least all of my craziness), to get organized and encourage myself to really express myself to others. I'm totally new to blogging and I do feel overwhelmed and wonder if I can bring that same awesomeness to my blog that I see in other blogs.

I can do all things through Christ who strengths me  (Philippians 4:13). Right, right! This verse in the bible, doesn't mean I don't have to put any effort into the things that come along my way.  Instead, it's because of Him, I can. Drawing near to Him and on His strength to carry me through!   I must draw on God's strength to care me through the messes I make and the trouble I get myself into! His word encourages me to think ahead and plug along.  Inch by inch, inchworming through the fog, the clutter in my head, and avoid becoming overwhelmed.  Break it down one step at a time.  

I want to do it all, but I can't.  At least, not at the same time. I must be focused on the goal and it's crazy different for all of us.  Here it goes.  Just a few ideas swimming in my head for the new year. A list of my goals and how I can accomplish these goals:

                 1.  Build my blog
                      a.  Join a few blogger communities
                      b. Study other sites

                  2.  Be better organized
                       a.  Get a calendar and use it
                       b.  Schedule a day and time to blog
                       c.  Purchase a note pad and write down ideas
                       d.  Make a list of things you need to accomplish

                  3.  Remove the clutter
                       a.  Get rid of the old to bring in the new
                            1.  I received a new blanket for Christmas, I will get rid of one
                            2.  Go through each room and toss out, sell or donate items
                       b.  Remove or add activities that help you reach your goals
                            1.  Spend less time on the phone
                            2.  I need to use what I have and not shop for more
                       c.  Break it down
                            1.  Work on one area at a time
                                   
                    4.  Be who you are
                         a.  Don't over think it
                              1.  Make it yours and own it
                              2.  Not everyone will like your ideas, but that's okay, I like it
                   
                    5.  You will fail but you will also succeed
                          a.  Write a down a verse , a saying, that encourages you
                          b.  Call a friend you can talk to and who has positive energy
                          c.  Play some high beat music and dance to it (it makes me feel better)
                          d.  Remember how blessed you are
                                 

I hope this has encouraged someone else to continue on their journey, what ever it may be.  I want to improve and grown in all areas of my life.   I know that things don't always work as planned, but we can put in the effort and inchworm our way through.


Saturday, November 16, 2013

Tissue Case

Hello everybody!  Here's a quick sewing project that's so easy!  Its quick and does not use much fabric, scraps, in fact!  Think I will be making one for each of my girlfriends!

It's a tissue case!  Sew Funky has a great tutorial: http://www.sew-funky.com/2009/05/01/tutorial-tissue-case/!


Please post your pictures if you decide to make one, make two or make more!


Sunday, November 10, 2013

Christmas Spider Legend

How many of you have heard of the Christmas Spider Legend?  Well, if you haven't here it goes:

THE CHRISTMAS SPIDER LEGEND

A long, long time ago, a gentle mother was busily cleaning the house for the most wonderful day of the year ... Christmas Day. Not a speck of dust was left anywhere. Even the little spiders had been banished from their cozy corner high up on the ceiling. To avoid the housewife's busy cleaning, they finally fled to the farthest corner of the forgotten attic.

Finally, it was Christmas Eve. The tree was decorated and the children delighted. But the poor spiders were frantic, for they could not see the tree, nor be present for the magic of the season. The oldest and wisest spider suggested that perhaps they could wait until everyone had gone to bed and then sneak through the crack in the door to see the wonders of the tree. The little spiders silently and carefully came down out of their attic corner and across the floor to wait in the crack on the threshold.

Pretty soon all was quiet, so the spiders quickly crept into the room. The tree towered so high that they couldn't see the ornaments on top. In fact, the little spiders' eyes were so small that they could only see one ornament at a time. They all scurried up the trunk, out along each branch, filled with a happy wonder at the glittering beauty. The spiders loved the Christmas tree. All night long, they danced in the branches, and every place they went left a trail of dusty, gray web. When at last they had inspected every bit of the Christmas tree, it was shrouded in the dusty gray of spider webs.

Santa smiled as he thought of the happy spiders seeing the tree and how much they liked it, but he also thought of how sad the little mother would be over the dusty tree. He reached out his hand -- and just then the sun came through the window and touched the tree. All the webs started to sparkle and shine turning into shimmering, sparkling silver and gold. The tree glistened in greater beauty than ever before!

According to legend, ever since this happened, people have hung tinsel on their Christmas trees. It has been a custom to include a spider among the decorations on the tree..


Sunday, November 3, 2013

Heart and Hand

I've been getting my sewing on and with the holidays approaching, eek, it's time to push that pedal to the metal!  It will be here before you know it.

Here's a really cute gift you can give your sewing friends!  A needle keeper!  I used Darlene Zimmerman Fabric (Robert Kaufman), for the log cabin quilt pattern heart, except for the center fabric.  I used red felt!  The rest of the hand should be made from heavier fabric.


The pattern is from the book, Folk Hearts by Pieceful Heart Designs! The design is Heart and Hand Needlekeeper


Happy sewing!

Wednesday, October 30, 2013

Friendship Quilt

Eight of us ladies from church gathered together and decided to take part in making this friendship quilt.  I am so happy to have made this quilt!!
Each one of us was given the hand fabric and one background fabric, enough fabric to make 8 hand blocks. We all signed our blocks we made and gave each friend one of those blocks while keeping one for ourselves. Then each one of us  finished our own quilt, adding our own embellishments to the quilt. The blocks and borders where all made according to how each person wanted their quilt to look. 
The process of making a friendship quilt is such a blessing! I have a piece of my friends with me.  One of these precious friends who participated in making a block is no longer with us, but I have a part of her in this quilt.  I will always cherish that. 


There are so many great friendship quilt patterns available.  Gather your friends and start quilting!!!!!

Sunday, October 27, 2013

Peak Hour

My most recent quilt made for my grandson, Benjamin, using a Riley Blake Design (On the Go)  and  Peak Hour fabric!  I changed it up a bit, only because I didn't purchase enough fabric!  I still love it, just the same!!!


For design: http://www.rileyblakedesigns.com
For fabric: https://www.google.com/search?client=safari&rls=en&q=peak+hour+fabric&ie=UTF-8&oe=UTF-8