Thank you!

Thank you for stopping by!!!!

Monday, October 20, 2014

Baby Shower-Tutu's and Tiaras


As promised below you will see some pictures of my
 Daughter-in-laws baby shower!  These pictures are some of the things I made.  I didn't get a picture of the watermelon
 and pasta salad I made, but course I had some 
help from her Mom who bought some meatballs, the drinks 
and Oreo dipped cookies. A friend made 
some cookies and organized the games.  We had 
her Aunt make Alexis' favorite sherbet ice cream 
punch and her cousin made the banner and 
some of the hanging decorations 
(she wasn't able to make the shower because she was picking up her new adopted daughter in Uganda). It turned 
out so cute and was fun too!
Some of the pictures didn't turn out, I need to
collect them from others that  took pictures!!!


Here's Alexis, due in December.  It's a girl!!
The banner!


Pink popcorn


Fondant cake!


The favors!!

Chocolate and white cupcakes!


Thanks for stopping by!


Ecclesiastes 3:11  
He Has Made Everything Beautiful In Its Time. 


Tuesday, October 7, 2014

Halloween Fabric- What to Make???


I've been working on my daughter in laws' baby shower!  So exciting because it's in two more weeks!  Once the shower is over I can post pictures, but not until.   

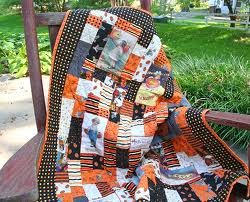
I just couldn't stay away from fabric.  I'm getting the itch to quilt. I thought I'd share some of my Halloween Fabric.  I'd really like to make a Mini #Halloween #Quilt or runner for my kitchen counter, but can't seem to decide on a pattern.  

Calling out for any suggestions.


Possible choices are:
(All images were found on the site below)


I guess you'll all have to wait to see what pattern I decide on!!!
Which one would you choose??


                                                   He Has Made Everything Beautiful In Its Time.  
Ecclesiastes 3:11  


Wednesday, September 17, 2014

Repair To Restore A Vintage Quilt

I was given this #vintage #Sue Bonnet quilt from either 
the 1930's to 1940's to make some repairs
 to this old damaged quilt.


I thought I took a picture of the damaged quilt but 
my files showed none.  (This blog was posted and
some how deleted.  I am rewriting and reposting.)


It's hard to tell but, a few of the dresses 
on the Sue Bonnet quilt needed to be 
replaced.  Here's one damaged dress.  


Before I attempted to work on this quilt I had 
to find some matching fabric that would go 
with the original pieces.  I did find the bright 
yellow one you see on the right.  It actually was
 a reproduction fabric from the 1940. 
 It was way to bright to use on the quilt so I 
bleached the fabric.  I would have liked the 
fabric to remain yellow but the end result was great.


after                                                                    before


After preparing the fabric
I carefully removed the embroidery floss from 
the dresses, the sleeves and on part of the bonnet
 in order to replace it and create a new pattern.  
The rest of the embroidery floss was 
removed from the bonnet once I started sewing.


I traced the dress onto the fabric I 
prepared.  The original fabric had the seam 
allowance folded under so I just added
 1/4" seam allowance to each dress.


I had to reverse one of the pattern 
pieces because Sue was facing the other way.


Here you see the dress pinned in place with 
the seam allowance turned under 1/4".


I also pinned the sleeve in place. 


I matched the color of the original embroidery floss used 
and began to sew.  In order to make it look right I did 
remove the rest of the embroidery floss from the bonnet.


When it came to repairing the larger holes on this vintage quilt I simply took some cotton thread and stitched around the hole to prevent the hole from getting larger.  The smaller holes were mended by hand with the same cotton thread to match the fabric.


Here's the end result and the quilt has been restored.  Can you tell which ones were redone?


He Has Made Everything Beautiful In Its Time.  
Ecclesiastes 3:11 


Monday, September 8, 2014

DIY-Painted Family Tree


For sometime now I've been wanting to paint a tree in the hall way of my house.  I finally got the nerve to do it.  

I simply used acrylic paints, and it actually turned out really nice.  The pictures you see in the photos are a few of the  ones  I had hanging before the tree.   


If you want to paint a tree, have no fear!  It's only paint and you can paint over it!

First, look on line to get a feel of what type of tree you want.

Second, decide where you want to paint your tree.  Do you want to paint the tree in the center of the wall, to the right, or to the left; how big, or small, etc. Also, what room of the house you want the tree in.  I have a girlfriend who wants to paint one in her daughter's room.

Then pencil an outline of your tree onto the wall.  I drew my tree on the left side of the wall.  I used a ruler to draw the  trunk of the tree just to make sure it was straight.


Third,  paint  the tree with two different colors of brown paint.  It didn't take much paint which I was really surprised.  I found I had to dip the tip of my brush with some water to smooth it out on the wall.  My tree is very simply.  It dried fairly quick. 


 Paint your leaves and hang your pictures!!


I'm in love with my wall.  Who knows I just might paint a few more leaves and branches on the right side of the same wall.  

Hope you will give this idea a try and if you do, please post your pictures of your wall!  I would love to see them.  Because I really do love trees.


He Has Made Everything Beautiful In Its Time.  
Ecclesiastes 3:11  

Thursday, July 24, 2014

Dresses for Mila!

Just recently I had the pleasure of attending
 a baby shower!  The young lady is adopting 
a two year old orphan from Uganda, Mila!
That is so amazing!

I whipped up a few simple dresses 
for Mila.  Using the #pillow case
 pattern for the first two dresses,
 this is what I sewed!


I just measured the front side of 
dress from seam to seam and cut 
 a piece of lace with the 
measurement I just took.  I  
sewed the top of lace in place!


Here I  cut (2) pieces of lace measuring 7" 
long.  Then I cut (1) 7-1/2" long 
piece of dress fabric and pressed 
down all the edges. Next,  sew
 this piece down the center!  Remember
 to start sewing below the top seam or 
you won't be able to get the 
ribbon through the seam!!


Here I used a pattern, but the pattern was
 so bad.  I ended up making by own pattern! 


Here she is wearing one of her dresses!


So Cute!!


He Has Made Everything Beautiful In Its Time.  
Ecclesiastes 3:11  


Saturday, July 5, 2014

Red, White and Blue Mini Quilt

Here's my red, white and blue mini quilt!


About a month ago I was rearranging my books in

 my sewing room and came across one of many favorites 
books I own, "Little Quilts All Through The House,
by Alice Berg, Mary Ellen Von Holt and 
Sylvia Johnson.  It's a cute book filled with 
lots of photos and you can use your scraps too!   


Flipping the pages, I came across this quilt.


Well, I just had to make it!  Forth of July was 
coming up and I've always wanted to have a 
quilt for every holiday!  I gathered up my 
materials, fabric I already owned.  Yeah!!!  
Cut and sewed my strips together.


Instead of sewing individual blocks and hearts
 on my mini quilt as directed on the pattern, 
I decided to just cut the size of the finished
  block with my star fabric.  I sandwiched 
the batting with the front and back fabric.  
I then used a decorative wave stitch just on 
the star area of the quilt. 


I then used a straight stitched on the rows of 
red and white strips.  I used the width of 
my walking foot to determine the 
width between stitches. 


Here's a look at the back of my mini quilt.


This post was linked up to: 

who is hosting

and


Crazy Mom Quilts


Check it out!
He Has Made Everything Beautiful In Its Time.  
Ecclesiastes 3:11